|
|
|
 |
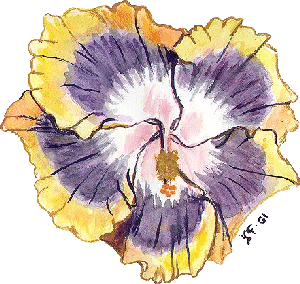
Sooner or later comes the day when you look at your hibiscus and say: "I wonder if I can get more plants of this particular hybrid myself?" and sometimes you can. Here's how I do it: | |
|
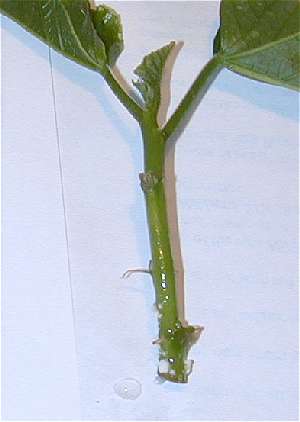
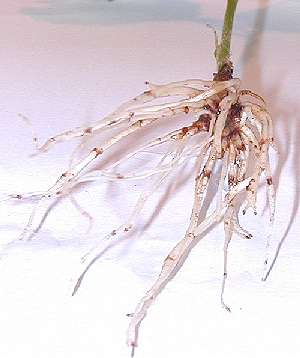
1. I root new, also called green, wood cuttings in water. That means the bark is still smooth and green in color (or reddish for varieties with red bark such as Pride of Hankins). Semiwoody cuttings work too but really old wood does better rooted directly in dirt. It seems keeping it in water makes the mature bark start to rot and thus damages the new roots. 2. Cut the plant material in pieces of 4-6" (10-15 cm) in length but no shorter than 3" (7.5 cm) and preferably no longer than 10" (25 cm). 3. Remove most of the leaves but save 2-3 for oxygen uptake. If the remaining leaves are large cut them in half across. 4. Pour 1-2" of warm (body temperature) water into a container. Add a few drops of hydrogen peroxide to discourage microbes from multiplying in it. |
 |
 |
5. Place the cuttings in the water. 6. If desired place a sprig of willow (salix spp.) in the water together with the cuttings. It releases a natural rooting hormone that will aid root development. For more on hormones go to Plant Hormones Made Simple for a quick overview of the subject. 7. Situate container in a light place but not in direct sun as that will dry out your cuttings. 8. Change the water about once a week and continue adding the hydrogen peroxide each time. Also remove any fallen leaves or other debris from the water as it will start to decay and make the water unsuitable. If at any time the water becomes murky replace it and rinse the cuttings thoroughly. |
|
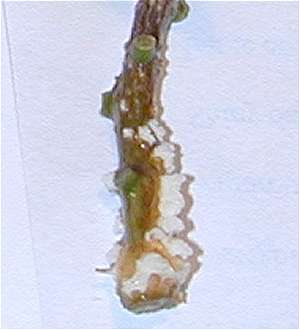
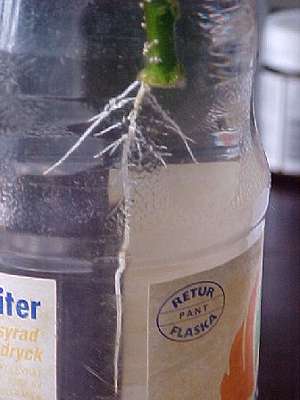
9. Callus (white little bumps on the stems) will begin to appear in a week or so. The amount of callus formation does not indicate the amount of roots. Sometimes roots form with very little callus, sometimes you get excess callus and little or no roots. 10. Real roots are discernible from four weeks and onward depending on the season and variety. These will come from the callus and the bottom edge of the cutting 11. Leave the plant in water until the roots have started to change from white to a light tan. This occurs about 2 months after "sticking" but can take up to 3-4 months, again depending on variety and time of year. The roots are now hard enough to plant in dirt without breaking. 12. Plant in your regular hibiscus soil, if possible one containing coco coir rather than peat, as coco doesn't have the unhappy tendency of peat to shrink when dry. Avoid planting your cuttings in pure peat - always mix in humus rich material with it. |
 |
 |
Since I'm in Europe my potting soil for hibiscus is a ready bought mix that contains peat, composted manure and composted bark. I blend these in rations of 2/5 soil, 2/5 bark and 1/5 manure. If your mix seems to hold too much water add some perlite and/or vermiculite to the final potting mix. My plants seems to like it anyway. I don't use a bag over the newly planted cuttings, have not found that it's needed. However, do not put the new pots in direct sun until the plant has firmly established itself which takes 2-4 weeks usually. Success rate depends on variety. For Double Red, Pride of Hankins and Brilliant the success is close to 100%. For some other varieties much lower. Please note that some exotic varieties won't root at all but have to be grafted. Wally Morgan has an excellent site on grafting hibiscus for the beginner. Well worth a visit. |